In order to create a SendGrid API Key, follow the steps below. Create a SendGrid Account
If you don’t have a SendGrid account already, go to SendGrid and create an account. If you have an account, log into your Dashboard. Set up Sender Authentication
If you have created a new SendGrid account, you will need to set up Sender Authentication in order to continue. In your SendGrid account, go to Settings → Sender Authentication and complete either Domain Authentication or Single Sender Verification. How to set up domain authentication Single Sender Verification
Create a SendGrid API Key
The next steps require valid SenderAuthentication please ensure you have completed step 2 before continuing. From your dashboard, navigate to Settings → API Keys Click Create API Key Give your API key a name Select Full Access Click Create & View
Copy your API key
You should keep a copy somewhere safe. For security reasons, SendGrid will only show you your API Key once. You can read more about SendGrid API Keys here https://sendgrid.com/docs/ui/account-and-settings/api-keys/ In your preezie Portal Navigate to Workflows → Edit → Results Email. 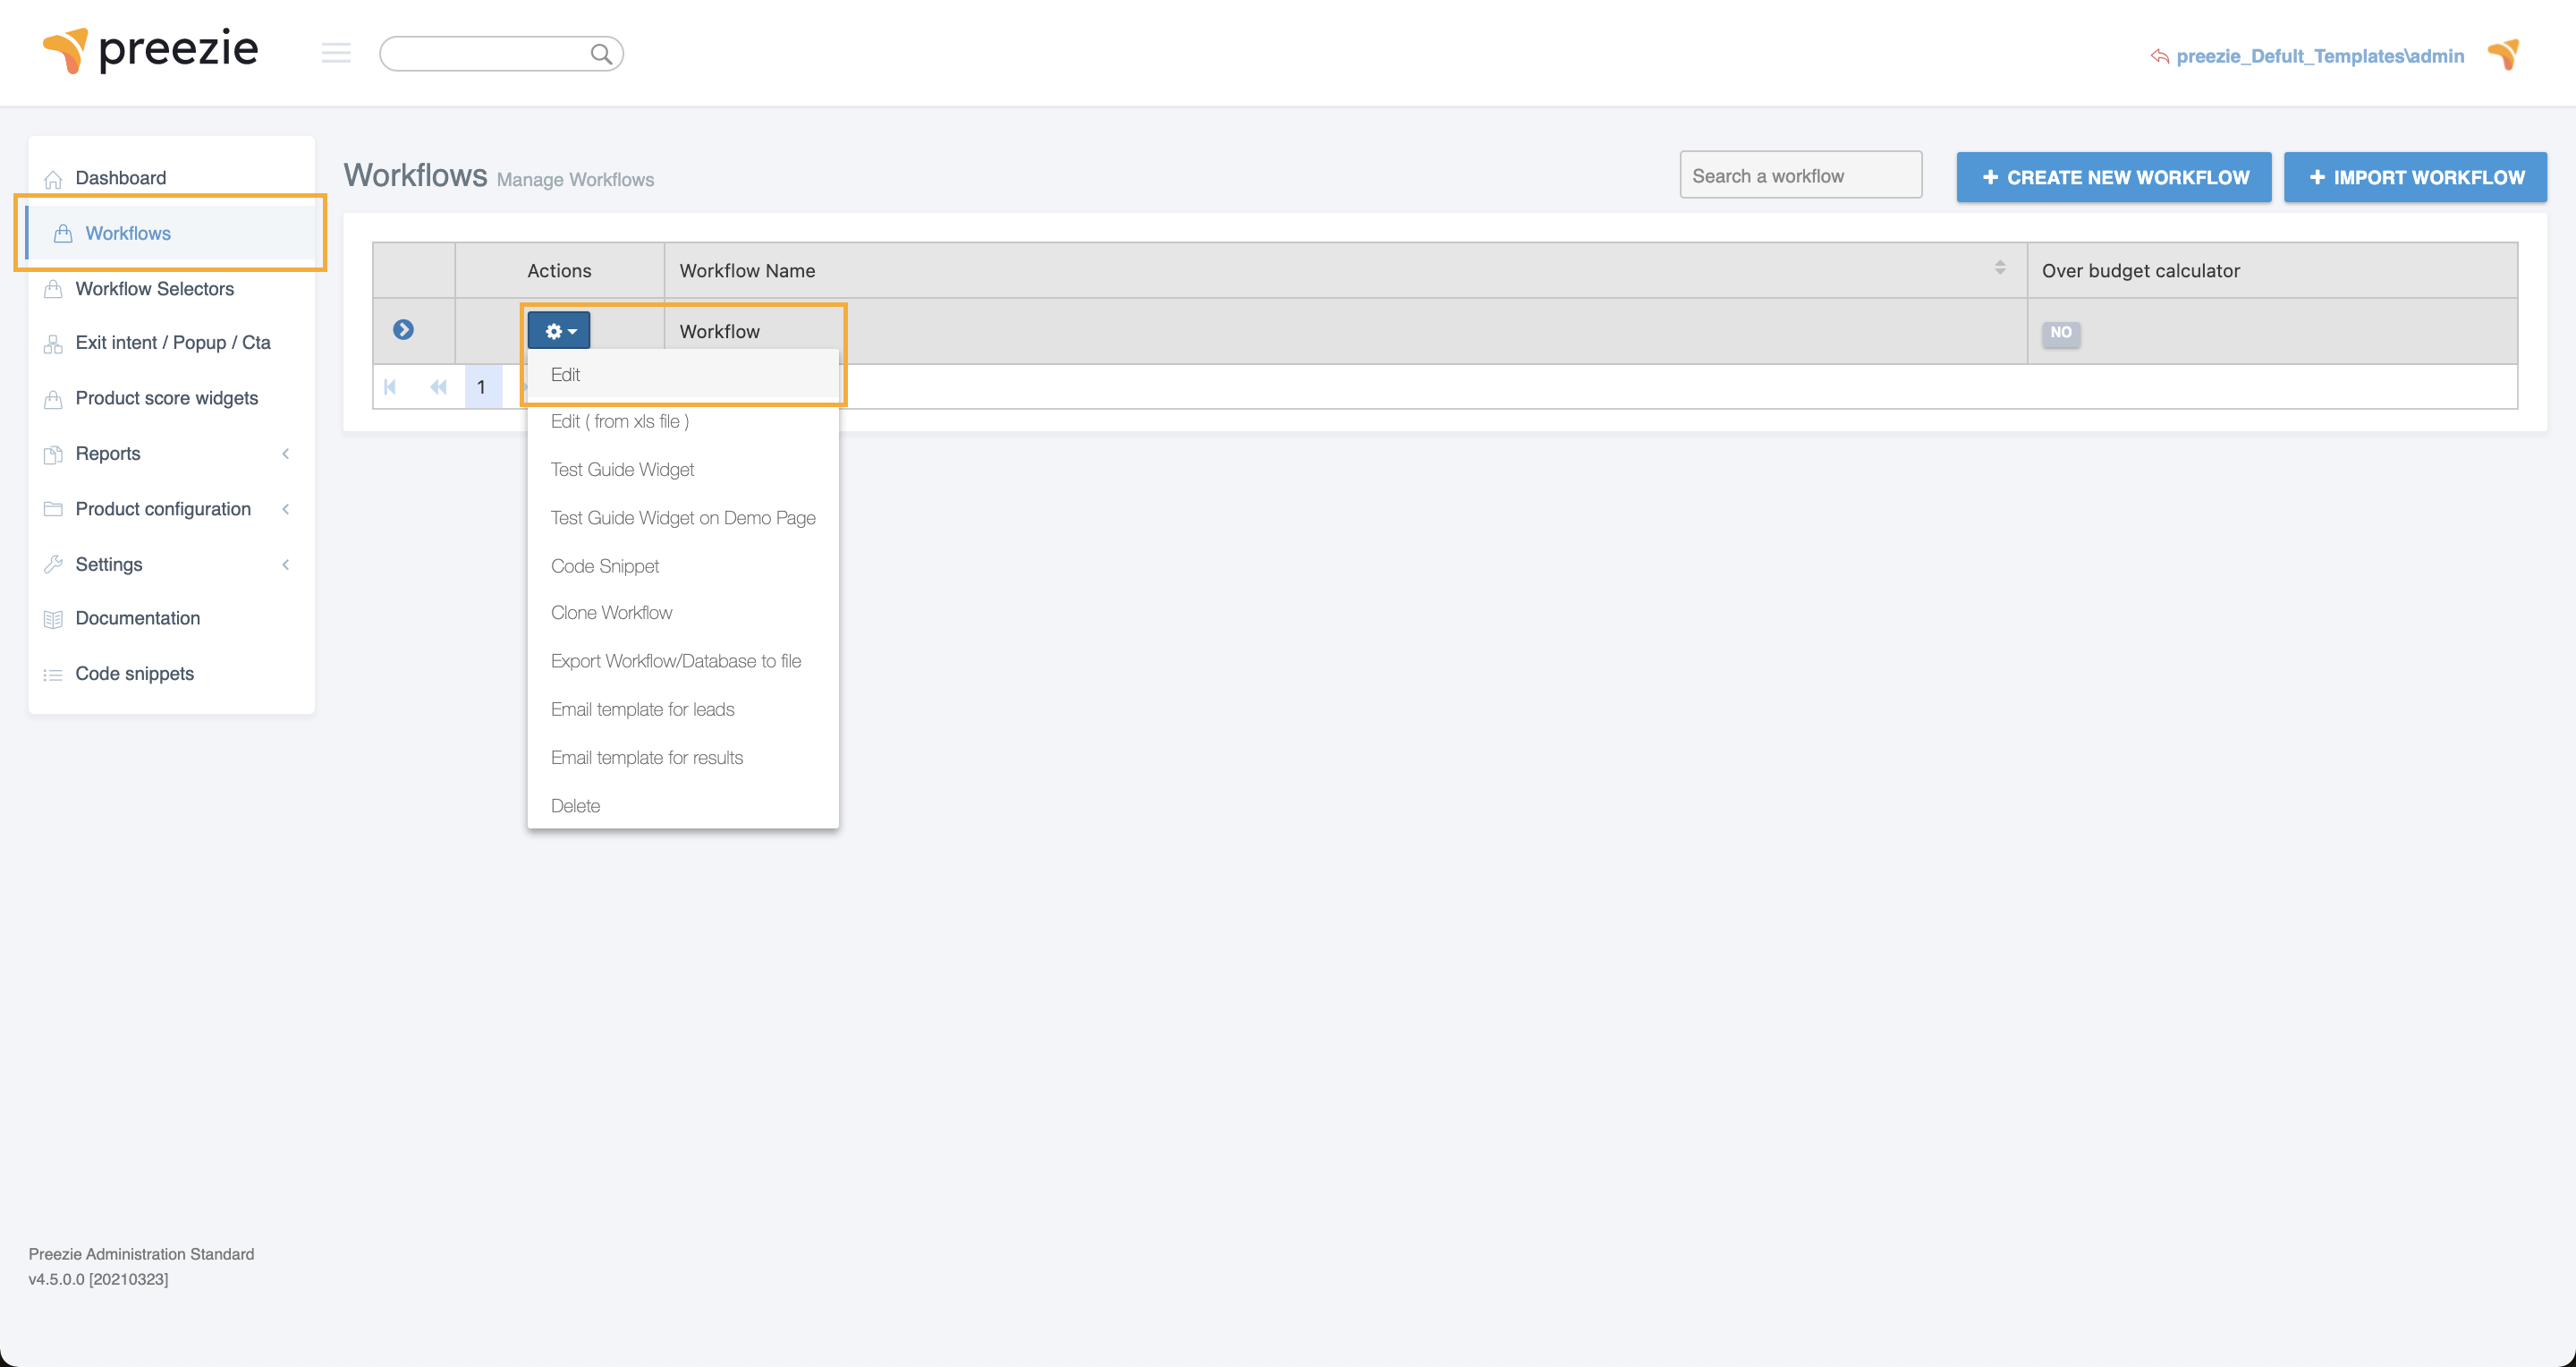 Image Modified Image Modified Add your SendGrid API Key and Authorised email address to the relevant fields 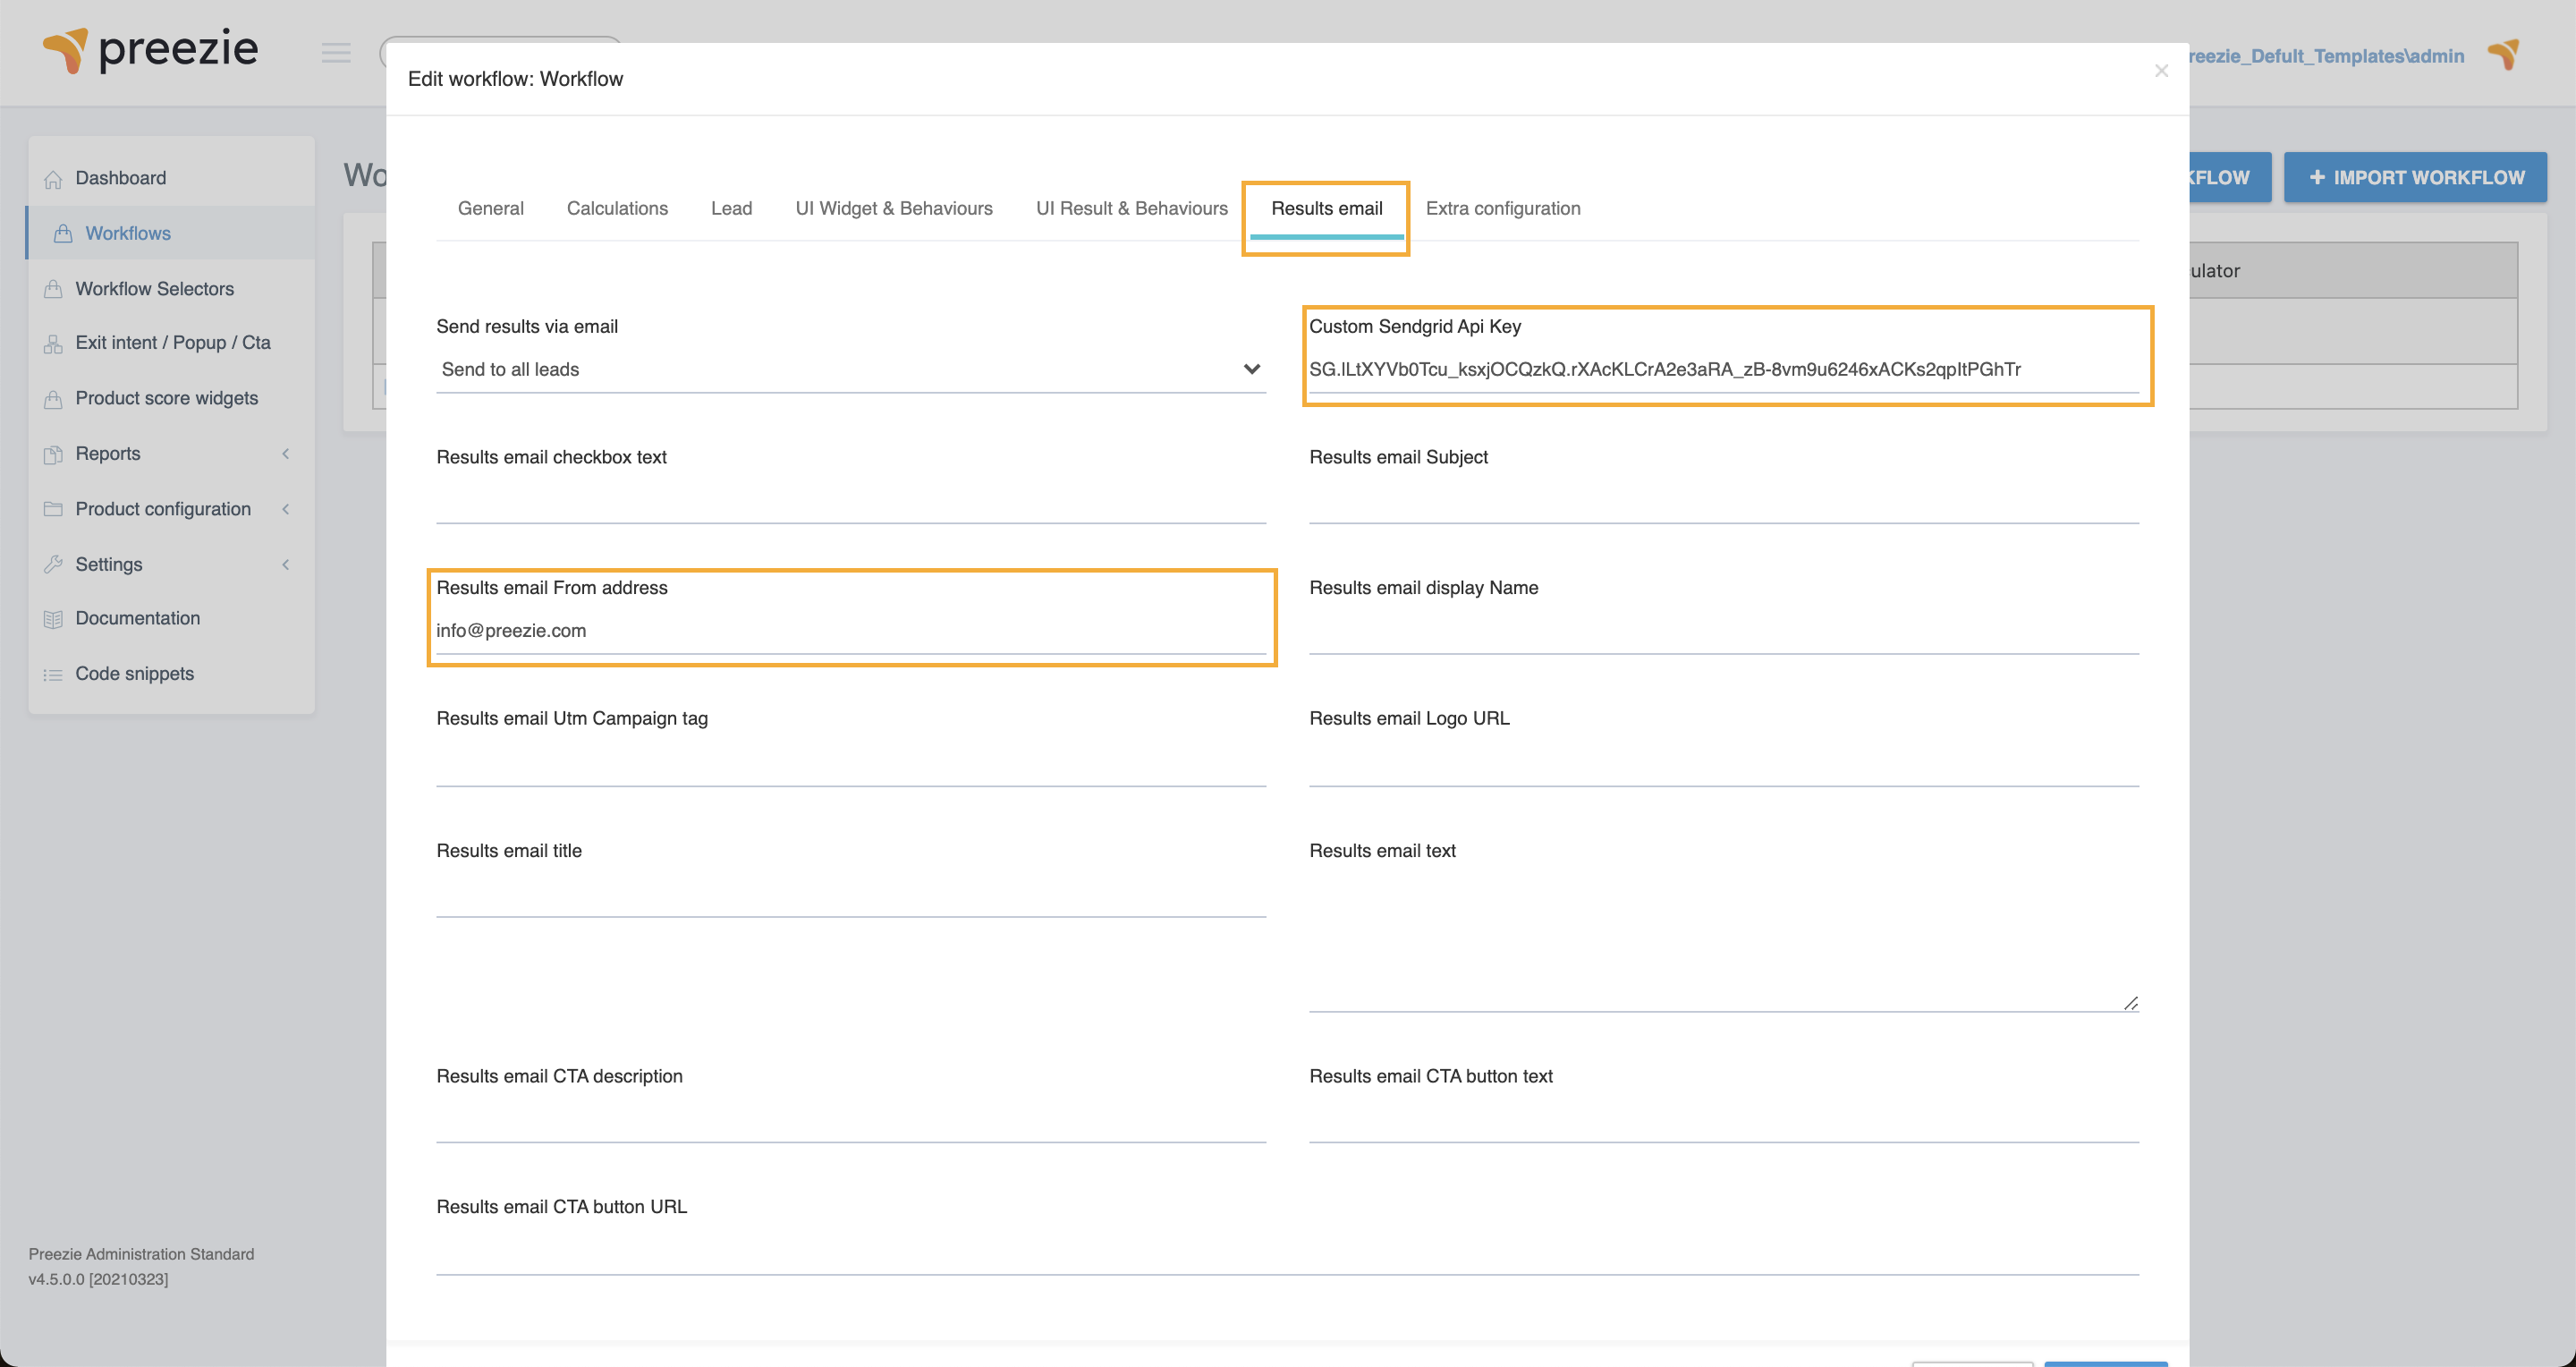 Image Modified Image Modified
|